Configure domain with Wordpress.com
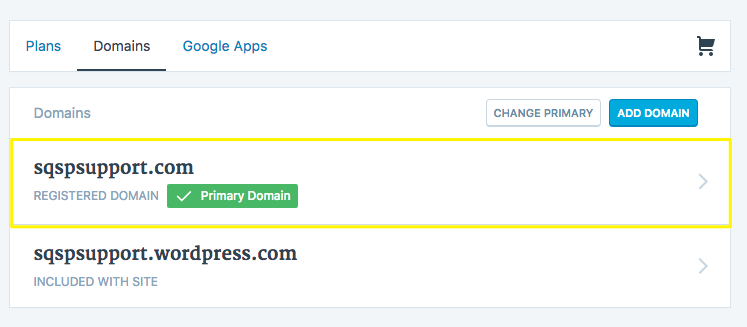
Go to www.wordpress.com and log into your account. Under My Site, click Domains.
Click the domain you're connecting to Squarespace.

Click Name Servers and DNS.
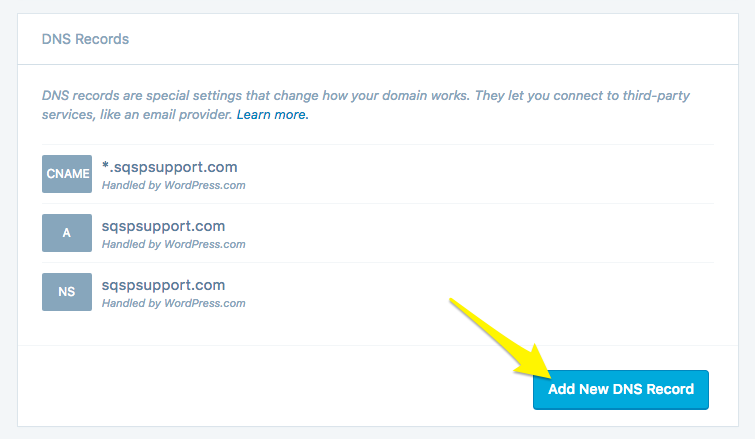
Click DNS Records.

You'll now copy the records from the Domain panel so your WordPress domain correctly links to your Squarespace site.
- Note: Don't delete MX records during this process. MX Records connect your email address. Deleting them could interfere with your email service.
Step 4 - Add the first CNAME
In the first line of your Domains panel, copy the unique code that appears directly below the Host column. The unique code is a random string of numbers and letters that must point to verify.squarespace.com.In your WordPress account, click Add New DNS Record.

Add your first record in the boxes that appear below.
- Select CNAME from the drop-down menu.
- In the first box, paste the unique code from Host column of the Domains panel.
- In the box to the right of alias of, enter "verify.squarespace.com"
- Click Add New DNS Record.
You should now have a CNAME with your unique Host code pointing to verify.squarespace.com.
Step 5 - Add the second CNAME
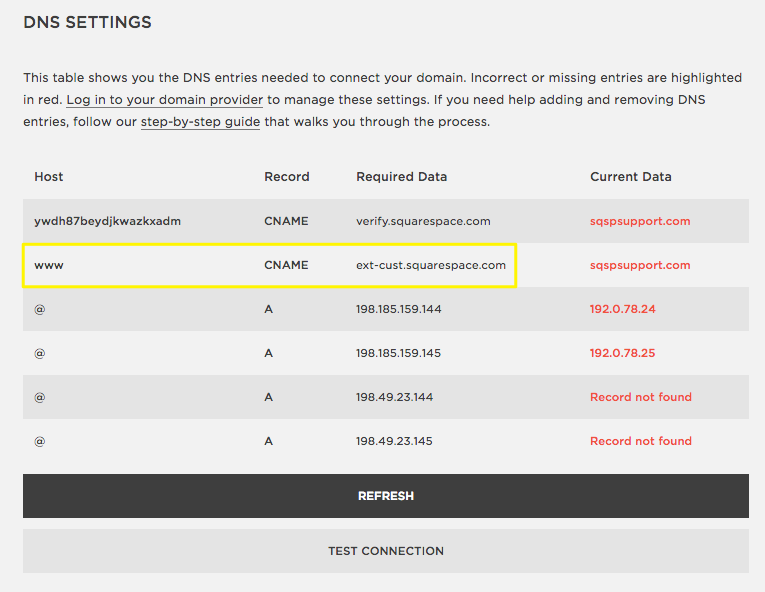
In the second line of your Domains panel, www appears directly below the Host column. This record must point to ext-cust.squarespace.com.
In your WordPress account, add another record.
- Select CNAME from the drop-down menu.
- In the first box, enter "www"
- In the box to the right of alias of, enter "ext-cust.squarespace.com"
- Click Add New DNS Record.
You should now have a CNAME with www pointing to ext-cust.squarespace.com.
Step 6 - Add A Records
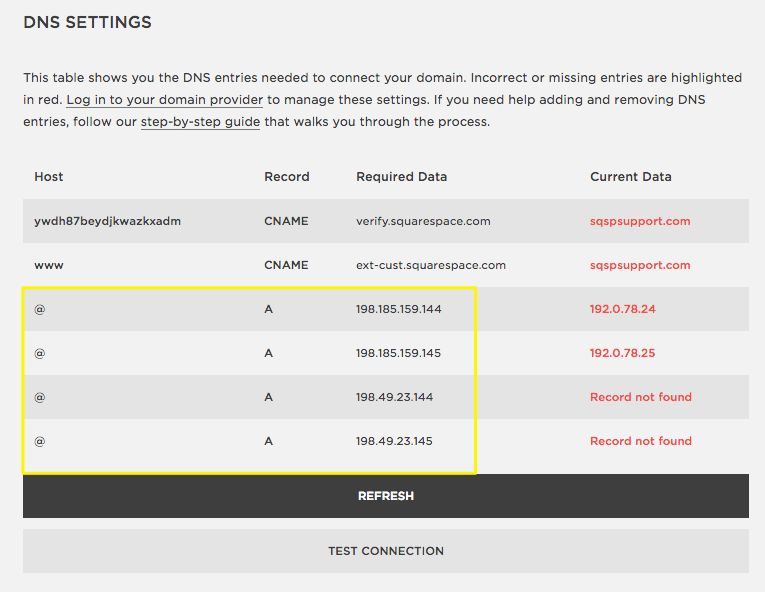
In the last four lines of your Domains panel, copy the IP addresses that appear in the Required Data column. Create four A Records in WordPress matching these values.
In your WordPress account, add another record.
- Select A from the drop-down menu.
- Leave the first box blank.
- In the box to the right of alias of, enter "198.185.159.144"
- Click Add New DNS Record.
Repeat this step to create three more A records for the following IP addresses:
- 198.185.159.145
- 198.49.23.144
- 198.49.23.145
- 198.185.159.144
- 198.185.159.145
- 198.49.23.144
- 198.49.23.145
Copyright © 2016 Bigpress Software

